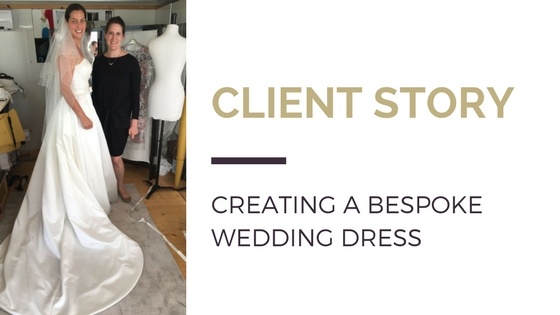
What is the process of creating a bespoke wedding dress? Where does the journey start and what can you expect along the way? Read on to follow my client Natalia’s story and see her dream wedding gown come to life.
Step 1: Initial design consultation
Our first chat was over the phone. We spoke for a while about what Natalia envisaged, the style and setting of her wedding, the budget and any worries she had in terms of fit. I advised her to go out and try on some dresses to get a feel for what she liked. Often what you think will work on your shape turns out to be quite different from the end result. Once she had a clearer idea of what she was looking for we met up to look at fabrics and so that I could take her measurements. By this time I already knew the direction the dress was going in so I was able to prepare some fabric samples that I felt would work with the design. I chose both polyester and silk samples to provide Natalia with a choice of qualities to suit her budget.
Now that we had the basics in place I was able to draft a pattern to her unique measurements and create a toile (cotton calico mock-up) of the dress.
Step 2: The first dress fitting – cotton toile
Above you can see the cotton toile on my mannequin. I don’t have pictures from that first fitting however you will see from later pictures that the skirt changed from this initial design. Seeing the dress on Natalia we realised that the full pleats all around the skirt weren’t flattering. She asked me to make the front of the skirt smoother and so we moved the pleats to the side. Her mother was also at the fitting and suggested making the train removable. This would give Natalia more freedom of movement for the evening’s dancing. Having a trusted person with you at the fittings is always a good idea. They know you well and will have your best interests at heart when sharing their opinion.
Step 3: The second fitting – real material
The second dress fitting is usually the most exciting as you can now really see the dress come to life. The actual material is used and it’s the first time you get a sense of the finished result. Natalia is tall and has a great figure with a full bust. This was the challenging part for me – creating a strapless bodice with sweetheart neckline whilst accommodating an F cup! Great undergarments are the key here as well as some hidden support structures. To me there is nothing worse than watching a bride constantly hiking up her dress when she should be enjoying herself safe in the knowledge that it fits perfectly.

Step 4: Final fitting before completion
With the larger issues of fit and materials completed I was now able to finish off the smaller details. I added buttons and loops to the back, created a belt with an embellished bow and figured out how to attach the train so that it looked as though it was a part of the dress. I also added hat crinoline ( aka horse hair braid) to make the hem of the train flare out and not end up in a lump as she walked down the aisle. Finally I created a personalised leather clutch bag to match Natalia’s shoes and reflect her Polish heritage with a traditional floral appliqué.

Bridal Dress Fitting
The timing of this last fitting is crucial. Most brides lose weight in the final weeks before their big day and I therefore aim to complete a dress no sooner than 2-3 weeks before the wedding.
The result

Strapless wedding dress with sweetheart neckline, lace bodice and full skirt
Working with Natalia was a complete joy and she looked so happy and comfortable on her wedding day. I had created some detachable straps for her dress just in case, but she decided that she didn’t need them.
Photography by Kelly Wallace Smith of www.uglyducklingphotography.com
I hope the above has given you an insight into the process of creating a bespoke wedding dress. If you’d like to talk to me about making your own dream wedding gown a reality please get in touch here.
Thank you for reading. Please feel free to share this post and leave me a comment or question. I’d love to hear from you.


Join the discussion One Comment